Binding Coil of Bahamut Turn 5 was added in patch 2.0 of the A Realm Reborn expansion.
Binding Coil of Bahamut Turn 5 becomes available at level 50 as part of the “Primal Awakening” quest, which is given by Urianger – The Waking Sands (X:6, Y:5).
The raid has a minimum ilevel of 82 to enter and rewards you with:
Allagan Tomestone of Poetics: 10
Guide
Turn 5 is the final turn within The Binding Coil of Bahamut and as a result, is the most difficult. It took over two months for the world first clear to be completed but since then the Twintania fight has been made a bit easier through a nerf to the Twister attack. The fight has five different phases, each being very difficult with no room for error. Below is a detailed guide for turn 5.
The optimal party setup for this turn is to have two tanks, two healers and four DPS. While it is possible to run it with one tank and five DPS this guide will assume you are using the more common setup with two tanks and four DPS.
Phase 1 – Adds
At the start of the fight you will notice that there are 3x The Scourge of Meracydia along with Twintania. These adds must be killed as soon as possible to give yourselves more time in the later phases (Twintania will enrage and wipe the group after about 13 minutes). AoE rotations should be used to take them down. After killing the adds start DPSing Twintania until the phase change around 85%.
Phase 2 – Fireball and Conflagration
Phase 2 begins when Twintania drops part of her necklace on the floor. She will then begin to use two mechanics, called Fireball and Conflagration. These will target anyone who is not in the top two positions on the threat list (those should be the tanks) and they can be tricky to deal with at first but with some practise you will get the hang of them. Fireball is a red target and Conflagration is a blue target.
Fireball will deal around 12,000 damage split between its target and anyone nearby. With good gear it is possible to split the damage between three players but some groups will opt for four. The advantage with three is that you have more time to deal with Conflagration since each player hit with Fireball adds a stack to Twintania that reduces the time Conflagration lasts by 5 seconds.
For this to work players either need to form two groups capable of handling a fireball or they can pick the two (or three) players with the most HP and have the player targeted with Fireball run into these players. If one of the two players is targeted with Fireball then the off tank must join them to form a group of three.
Conflagration will trap a player and anyone standing near them; they will be unable to move or attack. For this reason it is important that only the player targeted gets trapped. They should move underneath Twintania so that they are out of the way of everyone else. The group will then have 15 or 20 seconds (depending on how many stacks Twintania was given) to kill the Conflagration before it explodes and kills anyone in it.
Fireball will be used while a Conflagration is up and the mechanics allow a player targeted by Fireball to run into the Conflagration for protection. They will be trapped until freed too but it saves you having to deal with the Fireball the same way you do when a Conflagration is not up. Doing this will also reset the timer for the Conflagration.
Fireball will be used every 35 seconds while Conflagration will be used every 20 seconds. This means the rotation through this phase is predictable. It will go like this:
F > 20s > C > 5s > F > 25s > F > 5s > F > C > 20s > F > 15s > C > 10s F > 25s > F C > 25s > F > 10s > C > 15s > F > Repeat
You should aim to clear this phase before the fifth Conflagration. If you cannot then you may have a DPS problem to figure out somewhere. Definitely clear the phase before the sixth otherwise you are risking running out of time. The phase will end when Twintania is at 55% HP.
Phase 3 – Divebombs and Snakes
This can be a tricky phase as you are not only on a DPS check but you have to dodge divebombs as well. You will have five snakes to kill, with one being larger than the rest and having a lot more HP. When the smaller snakes die they will give a stack to the larger snake that increases your damage by 25%, meaning when all four snakes have died you will be doing double damage to it.
You should begin the phase by running to the pit that is at the edge of the arena to the right of where you start the fight. Stand next to the arena wall but not on it because touching it will kill you. When you see the green target on the group you should run out of the pit until it disappears, and then run back in. This is how you dodge a divebomb. There will be three of these and then a gap. During the gap you should DPS the small snakes to around 50% and then DPS the large snake until the next set of divebombs. Dodging these is the same again.
After the third divebomb the off tank should pull the two small snakes to the opposite end of the arena where two more small snakes will appear. He will then pull them towards the middle where the main tank will be waiting with the large snake. The BLM or SMN in the group should be preparing a limit break for when they arrive. The group should then kill the small snakes as fast as possible followed by the large snake. All your DPS cooldowns should be used on the large snake and you should use mega potions of STR, INT etc. to help increase your damage.
Twintania returns to the arena exactly two minutes after the phase began regardless of whether you have finished the snakes. You must stand on one of the Neurolinks (black circles) when this happens because Twintania will use her ultimate ability that does around 3500 damage to everyone. If someone is not on a Neurolink it will do more damage than they can take and kill them.
Phase 4 – Twisters and Dreadknights
In phase 4 Twintania will no longer be using Fireballs and Conflagrations but instead she will introduce two new attacks called Twisters and Dreadknights. Twintania should be positioned towards the entrance of the fight while everyone else in the group spreads out. Melee DPS should be either side of Twintania.
When Twintania uses a Twister it will target three players at random and will kill them if they do not dodge it. To dodge it you should run away from it. Twisters will also have a knockback effect and this is why spreading out is important; you don’t want to be knocked into another player’s Twister.
A Dreadknight will spawn in the middle of the room after the first Twister and will target a player at random. It will then move towards them and kill them if it reaches them. For this reason everyone should stay as far away from the middle of the room until it has chosen its target. This will stun them until it is defeated. The DPS should burn it down as quickly as they can.
Twisters can happen even while a Dreadknight is up so it is important to be aware of what Twintania is doing. This is where focus target can help. Twisters and Dreadknights will keep happening until until Twintania is at 30% HP. To get out of the phase faster it can help for melee DPS to use the limit break on Twintania around 35%.
Phase 5 – Hatch and Liquid Hell
This is the final phase and is actually somewhat easier than the previous phase. This is why it made sense to use your limit break there. Twintania will lose the ability to use Twisters and Dreadknights and gain the ability to use Hatches and Liquid Hells.
Hatches are something you can mitigate with positioning. The off tank should permanently stand in the black Neurolink that fell under Twintania at the end of phase 4. Ranged DPS and healers should stand near one of the other Neurolinks. When Twintania uses a Hatch it will spawn an orb underneath her that will fly towards the targeted player. The targeted player is visible via purple orbs spinning around him or her. As the off tank is standing on a Neurolink this will catch all of the Hatches, meaning you do not have to worry about this attack.
Liquid Hell is the same fire circles used by the Scourge of Meracydia adds in phase 1, with a twist. When it is used by Twintania it will target a player and five Liquid Hells will be dropped on them. This is enough to kill anyone but the main tank. When a player is targeted by this they must run to the outer edge of the arena and run around the edge until all five have been dropped. This is to avoid placing them over other people.
If the main tank is targeted by Liquid Hell he should stand there and eat the first two, then use Hallowed Ground to take the rest. Afterwards he should rotate Twintania in order to move out of the Liquid Hells. You can’t afford to move Twintania away from this position so take care.
If the off tank is targeted by Liquid Hells he will need to dodge the same way as everyone else, but this opens up the group to Hatches. If a Hatch happens while the off tank is away from the Neurolink the targeted player will need to be positioned on a Neurolink.
After this phase you will win and enjoy a nice cutscene and two chests (one containing an allagan i95 weapon) as your rewards.
Bosses
The Binding Coil of Bahamut Turn 5 raid contains one boss, which is Twintania. This drops a variety of equipment.Binding Coil of Bahamut Turn 5 Map
Binding Coil of Bahamut Turn 5 has 1 map. We have listed the maps in order of entry. Click on the map for a larger version.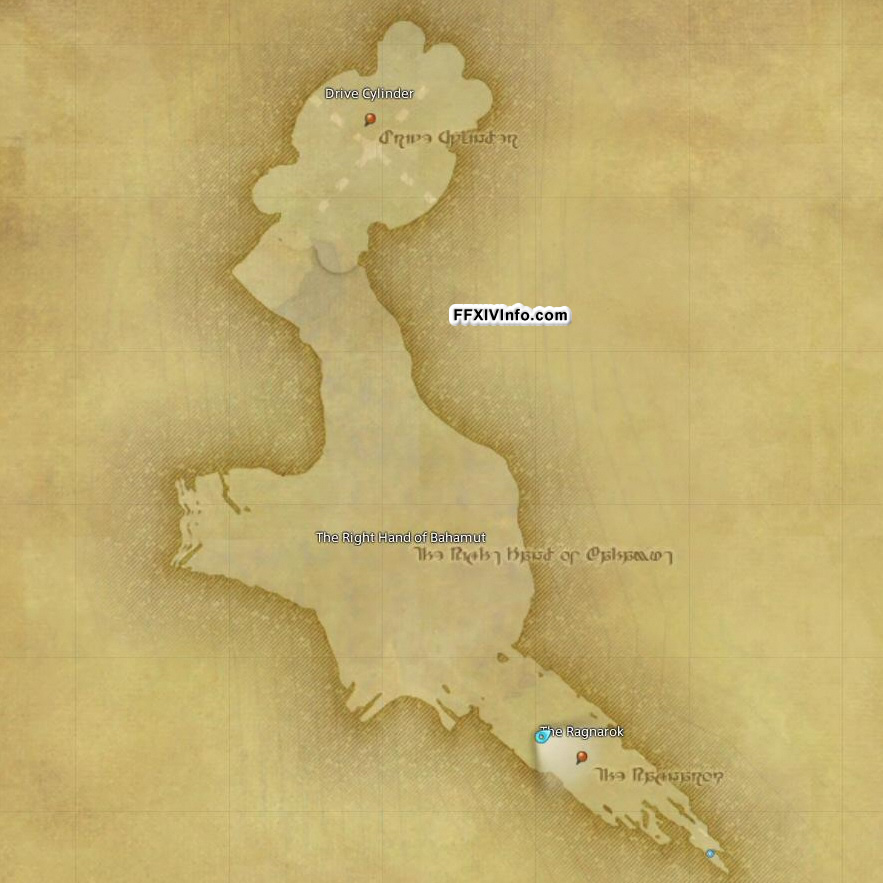
Click for a larger version.
Binding Coil of Bahamut Turn 5 Loot List
Below is a listing of all loot for the raid Binding Coil of Bahamut Turn 5.| Items () | Stats/Compatibility/Description | Level | iLvl | |
|---|---|---|---|---|
|
Allagan Aetherstone – Body Gear | An Allagan device that, when affixed to gear, augments the gear’s strength. | 1 | 180 |

|
Allagan Aetherstone – Weaponry | An Allagan device that, when affixed to a weapon, augments the weapon’s strength. | 1 | 210 |
|
Allagan Baghnakhs PGL MNK | Strength: +34, Vitality: +35, Critical Hit: +39, Determination: +27 Chest: Twintania | 50 | 95 |
|
Allagan Battleaxe MRD WAR | Strength: +34, Vitality: +35, Direct Hit Rate: +39, Determination: +27 Chest: Twintania | 50 | 95 |
|
Allagan Blade GLA PLD | Strength: +24, Vitality: +25, Tenacity: +28, Direct Hit Rate: +20 Chest: Twintania | 50 | 95 |
|
Allagan Bracelets of Maiming All Classes | Strength: +15, Determination: +18, Critical Hit: +13, Vitality: +16 Chest: Twintania | 50 | 90 |
|
Allagan Breeches of Healing CNJ WHM SCH AST SGE | Mind: +30, Vitality: +29, Piety: +36, Critical Hit: +25 Chest: Twintania | 50 | 90 |
|
Allagan Cane CNJ WHM | Mind: +34, Vitality: +32, Spell Speed: +39, Piety: +27 Chest: Twintania | 50 | 95 |

|
Allagan Chest Gear Coffer (IL 90) | A weighty chest containing a piece of Allagan attire. Required level: 50. IL: 90. Chest gear type determined by current job or class at time of opening. Cannot be opened in instanced areas such as dungeons, PvP areas, or raids. | 1 | 1 |

|
Allagan Choker of Casting All Classes | Intelligence: +15, Spell Speed: +18, Critical Hit: +13, Vitality: +14 Chest: Twintania | 50 | 90 |
|
Allagan Composite Bow ARC BRD | Dexterity: +34, Vitality: +35, Skill Speed: +39, Direct Hit Rate: +27 Chest: Twintania | 50 | 95 |
|
Allagan Cuirass of Striking PGL ROG MNK NIN SAM VPR | Strength: +30, Dexterity: +30, Vitality: +32, Critical Hit: +36, Direct Hit Rate: +25 Chest: Twintania | 50 | 90 |
|
Allagan Daggers ROG NIN | Dexterity: +34, Vitality: +35, Critical Hit: +39, Skill Speed: +27 Chest: Twintania | 50 | 95 |
|
Allagan Grimoire of Casting ACN SMN | Intelligence: +34, Vitality: +32, Critical Hit: +39, Determination: +27 Chest: Twintania | 50 | 95 |
|
Allagan Grimoire of Healing SCH | Mind: +34, Vitality: +32, Critical Hit: +39, Determination: +27 Chest: Twintania | 50 | 95 |
|
Allagan Guillotine DRK | Strength: +34, Vitality: +35, Determination: +39, Direct Hit Rate: +27 Chest: Twintania | 50 | 95 |
|
Allagan Helm GLA MRD PLD WAR DRK GNB | Strength: +19, Vitality: +20, Tenacity: +22, Direct Hit Rate: +15 Chest: Twintania | 50 | 90 |
|
Allagan Leather | A large piece of treated chimerical leather used by the Allagan Empire to craft light armor. | 1 | 90 |
|
Allagan Pistol MCH | Dexterity: +34, Vitality: +35, Critical Hit: +39, Direct Hit Rate: +27 Chest: Twintania | 50 | 95 |
|
Allagan Ring of Aiming All Classes | Dexterity: +15, Direct Hit Rate: +18, Skill Speed: +13, Vitality: +16 Chest: Twintania | 50 | 90 |
|
Allagan Rod THM BLM | Intelligence: +34, Vitality: +32, Direct Hit Rate: +39, Spell Speed: +27 Chest: Twintania | 50 | 95 |
|
Allagan Round Shield GLA PLD | Strength: +9, Vitality: +9, Tenacity: +11, Direct Hit Rate: +8 Chest: Twintania | 50 | 90 |
|
Allagan Scepter THM BLM | 50 | 95 | |
|
|
Allagan Scepter THM BLM | Intelligence: +24, Vitality: +23, Direct Hit Rate: +28, Spell Speed: +20 Chest: Twintania | 50 | 95 |
|
Allagan Silk | A spool of thick chimerical silk used by the Allagan Empire to craft mage robes. | 1 | 90 |
|
Allagan Sollerets of Maiming LNC DRG RPR | Strength: +19, Vitality: +20, Determination: +22, Critical Hit: +15 Chest: Twintania | 50 | 90 |
|
Allagan Spear LNC DRG | Strength: +34, Vitality: +35, Determination: +39, Skill Speed: +27 Chest: Twintania | 50 | 95 |
|
Allagan Star Globe AST | Mind: +34, Vitality: +32, Determination: +39, Piety: +27 Chest: Twintania | 50 | 95 |
|
Allagan Tassets of Aiming ARC BRD MCH DNC | Before becoming obsolete due to advancements in tailoring, belts such as this were used for holding up trousers and the like. | 50 | 90 |
|
Allagan Trousers of Aiming ARC BRD MCH DNC | Dexterity: +30, Vitality: +32, Direct Hit Rate: +36, Critical Hit: +25 Chest: Twintania | 50 | 90 |

|
Allagan Weapon Coffer (IL 95) | A weighty chest containing a weapon of Allagan make. Required level: 50. IL: 95. Weapon type determined by current job or class at time of opening. Cannot be opened in instanced areas such as dungeons, PvP areas, or raids. | 1 | 1 |
|
Allagan Wootz Nugget | A small chunk of the alloy used by the Allagan Empire to craft heavy armor. | 1 | 90 |
|
Faded Copy of Thunderer | Timeworn pages of sheet music retrieved from the Ragnarok. | 1 | 1 |
|
|
Faded Copy of Thunderer | Timeworn pages of sheet music retrieved from the Ragnarok. | 1 | 1 |

|
Paladin’s Allagan Arms (IL 95) GLA PLD | A set of arms containing an Allagan blade and Allagan round shield. Required level: 50. IL: 95. | 1 | 1 |