Titan (Hard) was added in patch 2.0 of the A Realm Reborn expansion.
Titan (Hard) becomes available at level 50 as part of the “in a Titan Spot” quest, which is given by Y’shtola – The Waking Sands (X:6, Y:5).
The trial has a minimum ilevel of 57 to enter and rewards you with:
Allagan Tomestone of Poetics: 15
Introduction
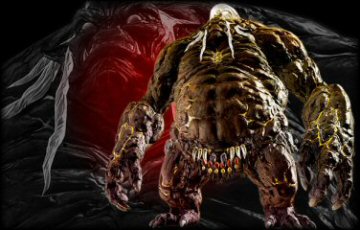
Titan is the third primal you will encounter on route to your relic weapon and the fight becomes available in the Waking Sands, Vesper Bay, Western Thanalan upon completing the Garuda quest. This fight is much more difficult than Ifrit and Garuda and requires perfect dodging to successfully complete. You will have to memorise Titan’s attack rotation and even be prepared to move before he uses skills in some cases.
Party Setup
This fight only requires one tank because there are no adds. You can then use the remaining slot to add an extra healer for safety or an extra DPS class to make the fight quicker. Which you choose will come down to how experienced your group is. It also helps if one of your healers is a WHM as they are better at big cures than SCH. The duty finder is not much use for this fight because of the way it imposes two tanks on you, it is just putting you at a disadvantage.
For Titan you should aim to have almost a full set of darklight before taking on the fight. Since the fight is very difficult you really should not be slowing your growing down with poor gear. Having a primal weapon should also be something to aim for but it doesn’t matter whether that is from Ifrit or Garuda.
Titan’s Attacks
This fight is all about dodging so it is important to understand Titan’s attack rotations and what each attack does. This section will not go into the rotations but it will explain what each attack does and how to avoid it.
Rock Buster: This is a simple frontal cone attack that should only hit the tank.
Mountain Buster: Similar to Rock Buster, except higher damage.
Landslide: Titan will aim a line based attack at a random player other than the tank. The line will be a narrow column of glowing ground and you must get out of it otherwise you will be knocked off the platform via the knockback effect in later phases.
Tumult: This is a stomp attack which deals a small amount of damage to everyone in the arena. The problem is he will stomp more than once. 2-3 times in phase 1 and an increasing amount in phase 2. IE every time he uses Tumult in phase 2 there will be an additional Tumult.
Geocrush: Titan jumps into the air and then lands in the arena shortly after causing a lot of damage to everyone. The damage is actually determined based on how close you are to the centre of the arena. You should move towards the edge, but not on the ring that has appeared because this chunk of the arena is about to disappear.
Weight of the Land: Often called Plumes by players because it looks like Ifrit’s Radiant Plume attack, this attack is very difficult to dodge. The attack is targeted on random party members and will deal very high damage to anyone caught in the circle.
Bomb Boulders: Bombs will drop on to the arena and then proceed to explode in order of which they were dropped. You should watch which bomb drops first and then move to this location once the first bomb has exploded.
Rock Throw: This attack will target a random player who is not the tank and trap them inside a rock called Granite Gaol. When trapped the player will not be able to move, attack or take damage (excluding Earthen Fury). Other players must destroy the rock to free the player.
Titan will of course use his signature attack Earthen Fury too but more on that later.
Preparations and Positioning
At the start of the fight the healer should apply their damage mitigation buffs to everyone before the main tank goes in for the pull. They will then take Titan to the north end of the arena and point him towards the edge so that only the tank gets hit by Rock Buster and Mountain Buster.
Phase 1
Phase 1 is considered the period before Titan uses Earthen Fury and there should be no deaths before this point. Basically if the group can’t handle this phase with ease then the group isn’t going to beat Titan.
Titan will use three rotations during this phase, each ending with Titan using Geocrush. This is when you know his rotation has altered.
The first rotation is simple, he will only use Landslide followed by Tumult, repeat.
The second rotation introduces Weight of the Land; the attack a lot of people are having problems avoiding. The rotation goes: Weight of the Land > Landslide > Tumult
The third rotation get a bit more difficult and is harder to remember. You could print a rotation and keep it next to you for reference if you find remembering 7 attacks difficult. The rotation is as follows:
Landslide > Weight of the Land > Bomb Boulders > Landslide > Weight of the Land > Rock Throw > Tumult
Rotation 3 will repeat until Titan is at around 60% HP, when the Earthen Fury phase will begin.
Earthen Fury
Titan will become untargetable and a new target will appear called Titan’s Heart. This is a DPS race and you must destroy the heart before Titan jumps into the air. Failure to do so will cause Earthen Fury to do more damage than the party can survive.
At the beginning of Earthen Fury Titan will trap a player in a rock and you should free this player as soon as possible. He will do the same towards the end of it too but you should ignore this one until after Earthen Fury.
Titan’s rotation during this phase will be slower than that of the other phases but he will use the following:
Rock Throw > Landslide > Weight of the Land > Tumult > Rock Throw > Landslide > Weight of the Land
Phase 2
Phase 2 is much the same as just before the Earthen Fury, except Titan’s rotation has changed again and you must now avoid 12 attacks in a single rotation. The rotation is as follows:
Tumult > Weight of the Land > Bomb Boulders > Landslide > Rock Buster > Mountain Buster > Weight of the Land > Rock Throw > Landslide > Rock Buster > Mountain Buster > Weight of the Land
Rock Buster and Mountain Buster should only ever hit the tank because no one else should be standing in front of Titan. Mountain Buster will hit the tank hard so the healer needs to be prepared to throw some high heals in.
As mentioned earlier, Tumult will now start doing one extra stomp for each rotation. This can get dangerous if Titan lives for too long because eventually the healers will use more and more MP and run out.
The rest is the same as you’ve been doing all battle.
Titan (Hard) Loot List
Below is a listing of all loot for the trial Titan (Hard).| Items () | Stats/Compatibility/Description | Level | iLvl | |
|---|---|---|---|---|
|
Cleavers of Crags ROG NIN | Dexterity: +27, Vitality: +28, Critical Hit: +33, Determination: +23 Chest: Titan | 50 | 80 |

|
Crag Weapon Coffer (IL 80) | A chest containing a weapon of the Crag. Required level: 50. IL: 80. Weapon type determined by current job or class at time of opening. Cannot be opened in instanced areas such as dungeons, PvP areas, or raids. | 1 | 1 |
|
Culverin of Crags MCH | Dexterity: +27, Vitality: +28, Direct Hit Rate: +33, Determination: +23 Chest: Titan | 50 | 80 |
|
Fists of Crags PGL MNK | Strength: +27, Vitality: +28, Direct Hit Rate: +33, Determination: +23 Chest: Titan | 50 | 80 |
|
Foil of Crags RDM | Intelligence: +27, Vitality: +25, Critical Hit: +33, Direct Hit Rate: +23 Chest: Titan | 50 | 80 |
|
Guillotine of Crags DRK | Strength: +27, Vitality: +28, Tenacity: +33, Determination: +23 Chest: Titan | 50 | 80 |
|
Katana of Crags SAM | Strength: +27, Vitality: +28, Direct Hit Rate: +33, Critical Hit: +23 Chest: Titan | 50 | 80 |
|
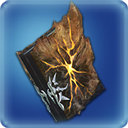
Staff of Crags THM BLM | Intelligence: +27, Vitality: +25, Direct Hit Rate: +33, Determination: +23 Chest: Titan | 50 | 80 |
|
Star Globe of Crags AST | Mind: +27, Vitality: +25, Piety: +33, Determination: +23 Chest: Titan | 50 | 80 |
|
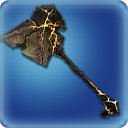
The Axe of Crags MRD WAR | Strength: +27, Vitality: +28, Tenacity: +33, Determination: +23 Chest: Titan | 50 | 80 |
|
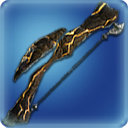
The Bow of Crags ARC BRD | Dexterity: +27, Vitality: +28, Direct Hit Rate: +33, Determination: +23 Chest: Titan | 50 | 80 |
|
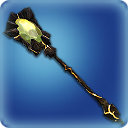
The Cane of Crags CNJ WHM | Mind: +27, Vitality: +25, Piety: +33, Determination: +23 Chest: Titan | 50 | 80 |
|
The Cudgel of Crags THM BLM | 50 | 80 | |
|
|
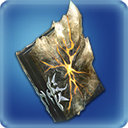
The Cudgel of Crags THM BLM | Intelligence: +19, Vitality: +18, Direct Hit Rate: +23, Determination: +16 Chest: Titan | 50 | 80 |
|
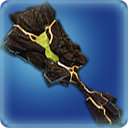
The Greater Key of Titan ACN SMN | Intelligence: +27, Vitality: +25, Direct Hit Rate: +33, Determination: +23 Chest: Titan | 50 | 80 |
|
The Holy Key of Titan SCH | Mind: +27, Vitality: +25, Piety: +33, Determination: +23 Chest: Titan | 50 | 80 |
|
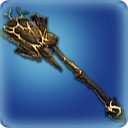
The Spear of Crags LNC DRG | Strength: +27, Vitality: +28, Direct Hit Rate: +33, Determination: +23 Chest: Titan | 50 | 80 |
|
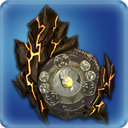
The Wall of Crags GLA PLD | Strength: +8, Vitality: +8, Tenacity: +10, Determination: +7 Chest: Titan | 50 | 80 |